How to Build a Card-Linked Application with the Web SDK
Fidel API makes it simple to add card-linking capabilities to any application. The process involves setting up a program and then registering or helping your users register their cards on your app. Once your environment goes live, Fidel API receives real-time transaction records and will pass them along to your application using webhooks. You can register your webhook URLs in the Fidel API Dashboard and start receiving the transaction data.
What Are We Building?
This tutorial will walk you through using the Fidel API to build an application with a card-linking feature. There are two main steps in the card-linking process.
The first requirement is to enroll a cardholder into your program by registering their card. Fidel API provides SDKs that enable you to register cards simply and securely. Continue reading below to learn how you can use the Fidel API Web SDK in a React application to register cards.
The second part of the card-linking process is the flow of transaction data whenever a user makes a purchase with a registered card. You can work with Fidel API's webhooks to automatically ingest a stream of real-time, standardized transaction data. This tutorial is going to walk you through setting up a Node.js server that listens for transaction data, registers it with the platform using ngrok and starts receiving transactions. You'll also use the server to send the transactions to the React client after receiving them, so you can display them in the UI.
Prerequisites
Before you begin, make sure you have a few things:
- A Fidel API Account: you can create one via the Fidel API Dashboard if you don't already have one!
- Node.js v12.22.1 or higher installed
- An ngrok account
- ngrok installed and set up.
Build the Client Application to Link Cards
You'll first build a React client to use the Fidel API Web SDK and give your application the ability to link cards to your Fidel API program.
Create a React Application
Let's go ahead and create a new React application using create-react-app. After you've generated a new project called fidel-card-linking-tutorial, run it using npm start.
1234npx create-react-app fidel-card-linking-tutorial
cd fidel-card-linking-tutorial
npm start
You should have a new blank React application running in your browser on port 3000. The generated files should look similar to this:
12345678910111213141516171819202122.
├── README.md
├── package.json
├── node_modules
├── public
│   ├── favicon.ico
│   ├── index.html
│   ├── logo192.png
│   ├── logo512.png
│   ├── manifest.json
│   └── robots.txt
├── src
│   ├── App.css
│   ├── App.js
│   ├── App.test.js
│   ├── index.css
│   ├── index.js
│   ├── logo.svg
│   ├── reportWebVitals.js
│   └── setupTests.js
└── yarn.lock
Add Tailwind CSS
You'll want to create a beautiful application, and for that, a CSS framework is probably the simplest option. Let's go ahead and add TailwindCSS to the empty React application. Add a line in the <head> section of the /public/index.html file:
12345<link
  href="https://unpkg.com/tailwindcss@^2/dist/tailwind.min.css"
  rel="stylesheet"
/>
Add Empty Layout
After you've added Tailwind into the empty project, remove the boilerplate code in the /src/App.js file and replace it with an empty application shell. It's already set up to have a header and a table to display the transaction data you'll get from Fidel API.
1234567891011121314151617181920212223242526272829303132333435363738394041424344454647484950515253545556575859606162636465import { ReactComponent as Logo } from "./assets/logo.svg";

function App() {
  const headers = ["Amount", "Scheme", "Card", "Status", "Date↓"];

  return (
    <div className="App h-full">
      <div className="h-full overflow-x-hidden">
        <nav className="bg-white shadow">
          <div className="flex flex-col container mx-auto md:flex-row md:items-center md:justify-between">
            <div className="flex justify-between items-center">
              <div className="flex justify-between items-center">
                <a href="https://fidel.uk/docs" className="w-full">
                  <Logo style={{ width: "90px", height: "60px" }} />
                </a>
                <button className="ml-10 w-full bg-blue-700 hover:bg-blue-900 text-white py-2 px-4 rounded">
                  Add Card
                </button>
              </div>
            </div>
            <div className="md:flex flex-col md:flex-row md:-mx-4">
              <a
                href="https://fidel.uk/docs/select/sdks/web/v3"
                className="my-1 hover:text-gray-800 text-blue-700 md:mx-4 md:my-0"
              >
                Documentation ↗
              </a>
            </div>
          </div>
        </nav>

        <div className="px-6 py-2 py-8">
          <div className="flex justify-between container mx-auto">
            <div className="w-full">
              <div className="flex items-center justify-between">
                <h1 className="text-xl text-gray-700 md:text-2xl">
                  Transactions
                </h1>
              </div>
              <div className="-my-2 py-2 overflow-x-auto sm:-mx-6 sm:px-6 py-2 lg:-mx-8 pr-10 lg:px-8">
                <div className="align-middle">
                  <table className="min-w-full">
                    <thead>
                      <tr>
                        {headers.map((header) => (
                          <th className="px-6 py-2 py-3 text-left text-gray-400 font-light text-sm">
                            {header}
                          </th>
                        ))}
                      </tr>
                    </thead>
                    <tbody className="bg-white"></tbody>
                  </table>
                </div>
              </div>
            </div>
          </div>
        </div>
      </div>
    </div>
  );
}

export default App;
Add Logo Components
You've probably noticed your application is failing to compile now. Don't worry - you'll just need to add the logo component that's being used in the empty application shell above. To do that, create a new assets folder inside the /src directory, and create an empty logo.svg file.
123mkdir src/assets
touch src/assets/logo.svg
Your application is still going to fail to compile, but with a new error. And that's because the empty SVG file should actually be a valid SVG. Replace the contents of /src/assets/logo.svg with the Fidel API logo:
123456789101112131415161718192021222324252627282930<?xml version="1.0" encoding="utf-8"?>
<svg
  version="1.1"
  id="Layer_1"
  xmlns="http://www.w3.org/2000/svg"
  xmlns:xlink="http://www.w3.org/1999/xlink"
  x="0px"
  y="0px"
  width="802px"
  height="407.6px"
  viewBox="0 0 802 407.6"
  style="enable-background:new 0 0 802 407.6;"
  xml:space="preserve"
>
  <style type="text/css"></style>
  <g>
    <g>
      <path
        class="st0"
        d="M101.3,286.7h45v-65.3h30.8l17.9-36.2h-48.7v-27.5H195v-36.2h-93.7V286.7z M231.7,286.7h45.5V121.5h-45.5
        V286.7z M422.7,141.4c-7.8-6.7-17.1-11.8-27.7-15.2c-10.6-3.4-22.1-5.2-34-5.2h-42.9v165.7H361c14.8,0,27.9-2.2,38.9-6.6
        c10.9-4.3,20-10.4,27.1-17.9c7.1-7.6,12.4-16.5,15.9-26.6c3.5-10.3,5.3-21.3,5.3-32.9c0-13.6-2.3-25.7-6.9-35.9
        C436.7,156.5,430.4,148,422.7,141.4z M392.9,236.9c-6.9,7.9-16.9,11.9-29.7,11.9h-3.6v-90h3.6c26.2,0,40,15.6,40,45.1
        C403.2,218,399.7,229.1,392.9,236.9z M482.3,286.7H576v-37.9h-48.7v-27.4H576v-36.2h-48.7v-27.5H576v-36.2h-93.7V286.7z
        M660.9,248.8V121.5h-44.9v165.2h84.8v-37.9H660.9z"
      />
    </g>
  </g>
</svg>
Add the Fidel API Web SDK
Now that your application compiles successfully, you'll see an empty table layout with a button above that prompts you to "Add Card". At this stage, the button doesn't do anything, so you'll need to add that capability to the React application. This is where the Fidel API Web SDK comes in handy. Add the SDK to the application to start registering cards on the Fidel API Platform.
First, at the top of your /src/App.js file, import useEffect from React.
12import { useEffect } from "react";
The Fidel API Web SDK is a JavaScript file hosted at https://resources.fidel.uk/sdk/js/v3/fidel.js. The required attributes for functioning correctly are the Fidel API SDK key, the program identifier and the company name.
You can find the SDK key in the "Account" section of the Fidel API Dashboard. For the purpose of this tutorial, use the test SDK key. It should start with pk_test_. The program identifier can be found in the "Program" section of the Dashboard. The Demo Program that comes with each new account has a contextual menu that you can use to copy the program identifier. For the company name, you can use anything you want. For the purposes of this tutorial, use something generic like "Card-Linking Application".
To add the SDK to your application, use an effect that runs only once at startup to create a <script> tag with the Fidel API SDK, add the required attributes to it, and then append it to the document body. In the App() function of the /src/App.js file, add the effect:
1234567891011121314151617181920212223function App() {
    const headers = ["Amount", "Scheme", "Card", "Status", "Date↓"]

    useEffect(() => {
        document.getElementById("fidel-form")?.remove();

        const sdkScript = document.createElement("script");
        sdkScript.src = "https://resources.fidel.uk/sdk/js/v3/fidel.js";
        sdkScript.id = "fidel-form";

        document.body.appendChild(sdkScript);
        return () => {
            document.body.removeChild(sdkScript);
        };
    }, []);

    return (
    ...
    )
}

export default App;
Because you've set auto-open to false in the SDK attributes, the SDK overlay will only appear if called, with Fidel?.openForm(). Add an onClick handler to the "Add Card" button to open the SDK overlay when clicked.
1234567891011121314151617<button
  onClick={() =>
    window.Fidel?.openForm({
      companyName: "Fidel",
      sdkKey: "pk_test_demo",
      programId: "bca59bd9-171b-4d1f-92af-4b2b7305268a",
      programType: "transaction-stream",
      callback() {
        console.log(arguments);
      },
    })
  }
  className="ml-10 w-full bg-blue-700 hover:bg-blue-900 text-white py-2 px-4 rounded"
>
  Add Card
</button>
Create Environment File
You might have noticed the example code didn't hardcode the values of the SDK key and program identifier but rather used environment variables. The generated React application already has support for environment variables. To use them, you need to create an .env file.
12touch .env
Add variables to it, and fill out the values for your SDK key and program identifier in REACT_APP_FIDEL_SDK_KEY and REACT_APP_FIDEL_PROGRAM_ID.
12345PORT=3001
REACT_APP_SERVER=http://127.0.0.1:3000
REACT_APP_FIDEL_SDK_KEY=
REACT_APP_FIDEL_PROGRAM_ID=
Because you've added the PORT environment variable, your application will now run on port 3001 and leave port 3000 open for the server we'll build in a minute. You'll need to restart your application with npm start. Your application should compile successfully and run at "http://localhost:3001/". If you click the "Add Card" button, a modal should pop up with a form to link a card.
Test Card Numbers
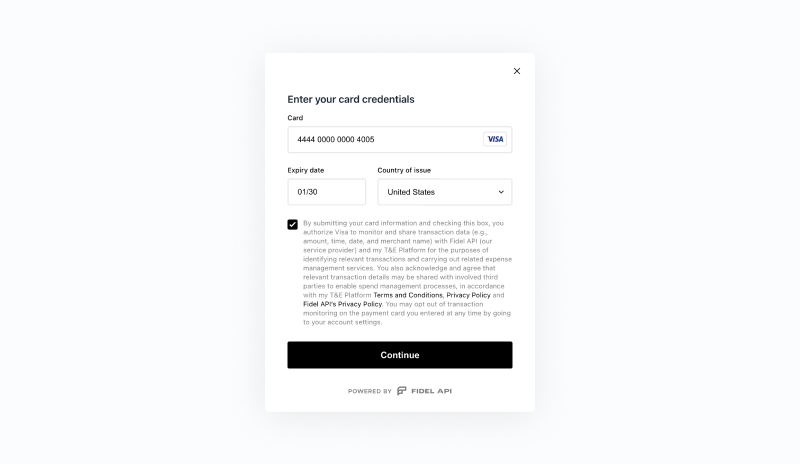
Because you're using the Test SDK key in your application, you won't be able to link a real card in the SDK. Fidel API has a range of test card numbers you can use while integrating or testing the API. To create a test Visa card, use the following card number pattern:
4444000000004*** where * can be any digit. For example, 4444000000004278.
Set an expiration date in the future, with a participating country of issue. When verifying a test card, type the value $0.67.
Congratulation, you have successfully added the ability to register cards to your React application and used it to link your first card on the Fidel API platform!
Server Listening For Webhook Events
To start receiving transactions from your linked card, you'll need to register webhooks in the Fidel API Dashboard. Before you can register them, you'll need to build them. Create a new server.js file at the root of your fidel-card-linking-tutorial folder.
12touch server.js
Let's go ahead and implement a fairly standard Node.js server, using express, that listens on port 3000. First, install the dependencies with $ npm install express cors and then add some boilerplate code to the server.js file.
12345678910111213141516171819import express from "express";
import { createServer } from "http";
import cors from "cors";

const PORT = 3000;

const { json } = express;

const app = express();

app.use(json());
app.use(cors());

const server = createServer(app);

server.listen(PORT, () => {
  console.log(`Server listening at http://localhost:${PORT}`);
});
The Fidel API platform can register a multitude of webhooks, so let's add a generic catch-all route /api/webhooks/:type that deals with webhooks and sends back a 200 OK response. If your webhook doesn't return a 200 status, the Fidel API platform retries sending the webhook until it receives a 200 status.
1234app.post("/api/webhooks/:type", (req, res, next) => {
  res.status(200).end();
});
If you try to run the server as is right now, you'll get an error saying you "Cannot use import statement outside a module". And that's because you're using modern import statements in your Node.js code. You'll need to update the package.json with a new line to support imports.
12"type": "module"
It would also be helpful if you could run both the React client and the Node.js server with the same command. Update the start script inside package.json to run the server and the client at the same time. You'll need to run npm start again after you're done.
1234"scripts": {
    "start": "node server.js & react-scripts start",
},
Register Webhooks with Fidel API
Now that you have created a server listening for webhooks, it's time to register those webhooks on the Fidel API platform. Your webhooks need to be publicly accessible on the Internet for Fidel API to be able to access them. Sadly, localhost is not publicly accessible, so you'll need to use ngrok to make it so.
There are a few other options here. Usually, with production code, you'll have it deployed somewhere with a URL. Or you'll have a load balancer in front of your code, and that will be publicly accessible. But for exposing local code, there aren't many options that don't involve a deployment. This is where ngrok comes in handy. It's a tunneling software that creates a connection between a public URL it hosts, like `https://someRandomId.ngrok.io, and a port on your local machine.
Because the server is running on port 3000, you'll start ngrok on that port with the http option. You'll get back a random-looking URL that is publicly accessible on the Internet, and you can use it as the base of your webhook URLs. For example, https://a709be896425.ngrok.io.

After you've got a ngrok URL, you can go ahead and register a couple of webhooks in the Fidel Dashboard. For the purposes of this tutorial, register the following webhooks on the Demo Program with the URL https://a709be896425.ngrok.io/api/webhooks/transaction.auth:
transaction.authtransaction.clearingtransaction.refund

Congratulations, you've registered your first webhooks with Fidel API. You can start receiving transaction data!
Socket.io to Glue It All Together
You've probably noticed your server can receive transaction data from Fidel API, but it doesn't do anything with that data. That's because what you do with that data depends heavily on your application use case. For the purpose of this tutorial, let's send that transaction data from the server to the React client, so you can display it in the UI.
Because the data comes from a webhook, your server doesn't have a lot of control over when it receives the data. Hence, your client can't keep asking for data that isn't there. Because of the event-driven nature of webhooks, long polling is not a great mechanism to pass data. There are a few options, mainly HTTP/2 Server Push, Node.js streams or Web Sockets. You can use something like socket.io, which combines WebSockets with long polling to ensure maximum browser compatibility while you pass the transaction data from the server to the client. And you'll use just that for this tutorial. Let's go ahead and install the dependencies with $ npm install socket.io socket.io-client.
Add Socket.io to the Server
You'll need to add the socket mechanism to the server first. Import the Server from socket.io at the top of your server.js file.
12import { Server } from "socket.io";
Before the webhook route is defined, instantiate a new socket server, and log to the console every time a client connects to the socket. Update the webhook route handler to emit on the socket every time there is new transaction data coming from Fidel API.
1234567891011121314151617const io = new Server(server, {
  cors: {
    origin: "http://localhost:3001",
    methods: ["GET", "POST"],
  },
});

io.on("connection", (socket) => {
  console.log("a client connected");
});

app.post("/api/webhooks/:type", (req, res, next) => {
  io.emit(req.params.type, req.body);

  res.status(200).end();
});
Now that the server is completed restart it with npm start.
Add Socket.io to the Client
You'll need to add socket.io to the client as well, in order to receive the transaction data and display it. At the top of your /src/App.js file, import socketIOClient from socket.io-client and useState from react.
123import { useState, useEffect } from "react";
import socketIOClient from "socket.io-client";
After you've imported the socket in your /src/App.js, you need to create a new socketIOClient in an effect. And register a listener that sets the transactions state on any incoming data.
1234567891011121314151617function App() {
    const [transactions, setTransactions] = useState([]);

    useEffect(() => {
        const socket = socketIOClient(process.env.REACT_APP_SERVER);

        socket.onAny((type, transaction) => {
            setTransactions([{ type, transaction }, ...transactions]);
        });

        return () => socket.disconnect();
    });
    return (
    ...
    )
}
Create Transaction Component
Now that you've got the data coming into the React client, let's create a Transaction component that displays it. First, create a components folder inside the src folder, and create an empty Transaction.js file in it.
123mkdir src/components
touch src/components/Transaction.js
A transaction has a type and information about the currency, amount, card scheme, card number, store brand, name and date of creation. Let's create a component that displays all that data to match the empty table we used in the initial empty shell for our application.
123456789101112131415161718192021222324252627282930313233343536373839import React from "react";

import { formatCard } from "../utils";
import { ReactComponent as Visa } from "../assets/visa-icon.svg";
import TransactionStatus from "./TransactionStatus";

const Transaction = ({ transaction, type, transactions }) => {
  return (
    <tr>
      <td className="px-6 py-2 whitespace-no-wrap border-b border-gray-200 text-sm">
        <div className="flex items-center justify-between">
          <span className="text-gray-400">{transaction?.currency}</span>
          <span>{transaction?.amount}</span>
        </div>
      </td>
      <td className="px-6 py-2 whitespace-no-wrap border-b border-gray-200 text-sm">
        <span className="text-gray-400">--</span>
      </td>
      <td className="px-6 py-2 whitespace-no-wrap border-b border-gray-200 text-sm">
        {transaction?.card?.scheme.toUpperCase() === "VISA" && <Visa />}
      </td>
      <td className="px-6 py-2 whitespace-no-wrap border-b border-gray-200 text-sm text-gray-400">
        {formatCard(transaction?.card)}
      </td>
      <td className="px-6 py-2 whitespace-no-wrap border-b border-gray-200 text-sm">
        {transaction?.brand?.name}
      </td>
      <td className="px-6 py-2 whitespace-no-wrap border-b border-gray-200 text-sm">
        <TransactionStatus status={type} />
      </td>
      <td className="px-6 py-2 whitespace-no-wrap border-b border-gray-200 text-sm">
        {new Date(transaction?.created).toLocaleString()}
      </td>
    </tr>
  );
};

export default Transaction;
For the application to compile, you'll need to create a few of the things we already used in the Transaction component. Start with the TransactionStatus component in the same folder as the Transaction component.
12touch src/components/TransactionStatus.js
A transaction can have three statuses: authorized, cleared and refunded. The information is contained in the transaction type being passed from the server in the socket. Let's use that data to have a different coloured pill for the status and make it instantly recognizable in the UI.
123456789101112131415161718192021222324252627282930313233343536import React from "react";

const TransactionStatus = ({ status }) => (
  <div>
    {status === "transaction.auth" && (
      <span className="relative inline-block px-3 py-1 font-semibold text-yellow-500">
        <span
          aria-hidden
          className="absolute inset-0 bg-yellow-200 opacity-50 rounded-full"
        ></span>
        <span className="relative text-xs">Auth</span>
      </span>
    )}
    {status === "transaction.clearing" && (
      <span className="relative inline-block px-3 py-1 font-semibold text-green-500">
        <span
          aria-hidden
          className="absolute inset-0 bg-green-200 opacity-50 rounded-full"
        ></span>
        <span className="relative text-xs">Cleared</span>
      </span>
    )}
    {status === "transaction.refund" && (
      <span className="relative inline-block px-3 py-1 font-semibold text-red-500">
        <span
          aria-hidden
          className="absolute inset-0 bg-red-200 opacity-50 rounded-full"
        ></span>
        <span className="relative text-xs">Refund</span>
      </span>
    )}
  </div>
);

export default TransactionStatus;
You'll also need to create the icon for Visa in the assets folder as SVGs, the same way as you did for the Fidel API logo.
12touch src/assets/visa-icon.svg
12345678910111213141516171819202122232425262728<svg
  width="29"
  height="10"
  viewBox="0 0 29 10"
  fill="none"
  xmlns="http://www.w3.org/2000/svg"
>
  <path
    fill-rule="evenodd"
    clip-rule="evenodd"
    d="M14.7771 3.18797C14.762 4.57733 15.9235 5.35133 16.7987 5.81318C17.6979 6.28578 17.9996 6.5891 17.9962 7.01173C17.9894 7.65913 17.2786 7.94439 16.614 7.95551C15.4534 7.97511 14.7796 7.61668 14.2427 7.34624L13.8247 9.45988C14.3637 9.72733 15.3597 9.96058 16.3923 9.9723C18.8181 9.9723 20.4043 8.67787 20.412 6.67207C20.4222 4.12684 17.1548 3.98636 17.1772 2.84902C17.1846 2.50327 17.4892 2.13551 18.1565 2.04106C18.4871 1.99479 19.3995 1.95869 20.4328 2.47278L20.8385 0.427536C20.2826 0.209585 19.5682 0 18.6783 0C16.3964 0 14.79 1.31105 14.7771 3.18797ZM24.7395 0.176346C24.296 0.176346 23.9223 0.454791 23.7566 0.883759L20.2919 9.82142H22.716L23.1977 8.38041H26.1596L26.4386 9.82142H28.574L26.71 0.176346H24.7395ZM25.0777 2.78243L25.7772 6.40391H23.8622L25.0777 2.78243ZM11.8397 0.176346L9.92964 9.82142H12.2386L14.148 0.176346H11.8397ZM8.42354 0.176346L6.02029 6.74094L5.04824 1.15945C4.93439 0.536328 4.48377 0.176346 3.98336 0.176346H0.054434L0 0.455986C0.80632 0.645602 1.72283 0.951192 2.2779 1.27686C2.61777 1.47628 2.71458 1.65024 2.82632 2.12404L4.66732 9.82142H7.10774L10.8486 0.176346H8.42354Z"
    fill="url(#paint0_linear)"
  />
  <defs>
    <linearGradient
      id="paint0_linear"
      x1="28.574"
      y1="0.259826"
      x2="0"
      y2="0.259826"
      gradientUnits="userSpaceOnUse"
    >
      <stop stop-color="#21489F" />
      <stop offset="1" stop-color="#261A5E" />
    </linearGradient>
  </defs>
</svg>
The only piece missing is a utils function to format the card number in the UI. Create a utils folder inside the src folder, and then an index.js file inside.
123mkdir src/utils
touch src/utils/index.js
Fidel API uses a tokenization mechanism for the card numbers and doesn't store the entire card number. You'll receive the first six, and last four numbers from the card number, and the six in between are missing. You'll replace those with asterisks and then split the long card number every other 4 characters to display. In the index.js file, create a formatCard method that contains the logic.
123456export function formatCard(card) {
  return `${card?.firstNumbers}******${card?.lastNumbers}`
    .match(/.{4}/g)
    .join(" ");
}
Now that you've created all the missing pieces for the Transaction component go ahead and add it to your main application. At the top of the /src/App.js file, import the Transaction component.
12import Transaction from "./components/Transaction";
Inside the render function, there is currently an empty <tbody> tag. Replace it to iterate over the transactions data, and map a Transaction component for each entry.
1234567891011<tbody className="bg-white">
  {transactions.map(({ transaction, type }, idx) => (
    <Transaction
      key={idx}
      transaction={transaction}
      type={type}
      transactions={transactions}
    />
  ))}
</tbody>
Congratulations, you can now display incoming transactions from Fidel API!
Simulate Transactions
Because you're using a Test Fidel API key, and because you're using test cards, you won't receive live transactions. There are different ways you can simulate test transactions on the Fidel API platform to test this tutorial. One of the simplest ones is to use the API Playground in the Fidel API Dashboard. Go in there and use the transactions /create endpoint to create a few different transactions. If you create one with a positive amount, followed by one with a similar but negative amount, it will be matched as a refunded transaction. This way, you'll get to experience all three transaction statuses in the UI. Because you've set up the webhook endpoints already, all transactions you create are passed from Fidel API to your ngrok URL, to your local server and then to your React client via socket.io. You should see them showing up in the UI, similar to this.

We hope you've had a great time following along with this tutorial, and you've learnt the basics of building your first card-linked application on the Fidel API platform, using the Fidel Web SDK, Node.js, React and socket.io.